Create
Choose your favorite people or a group.
Open Favorites Widget and create a widget. Select the contacts you want to keep close, arrange them in the order you prefer, and choose the contact photos and names that should appear.
 Favorites WidgetDownload on theApp Store
iPhone contact widget guide
Create a Home Screen or Lock Screen widget for the people you call and message most. Setup usually takes about five minutes.
Download on theApp Store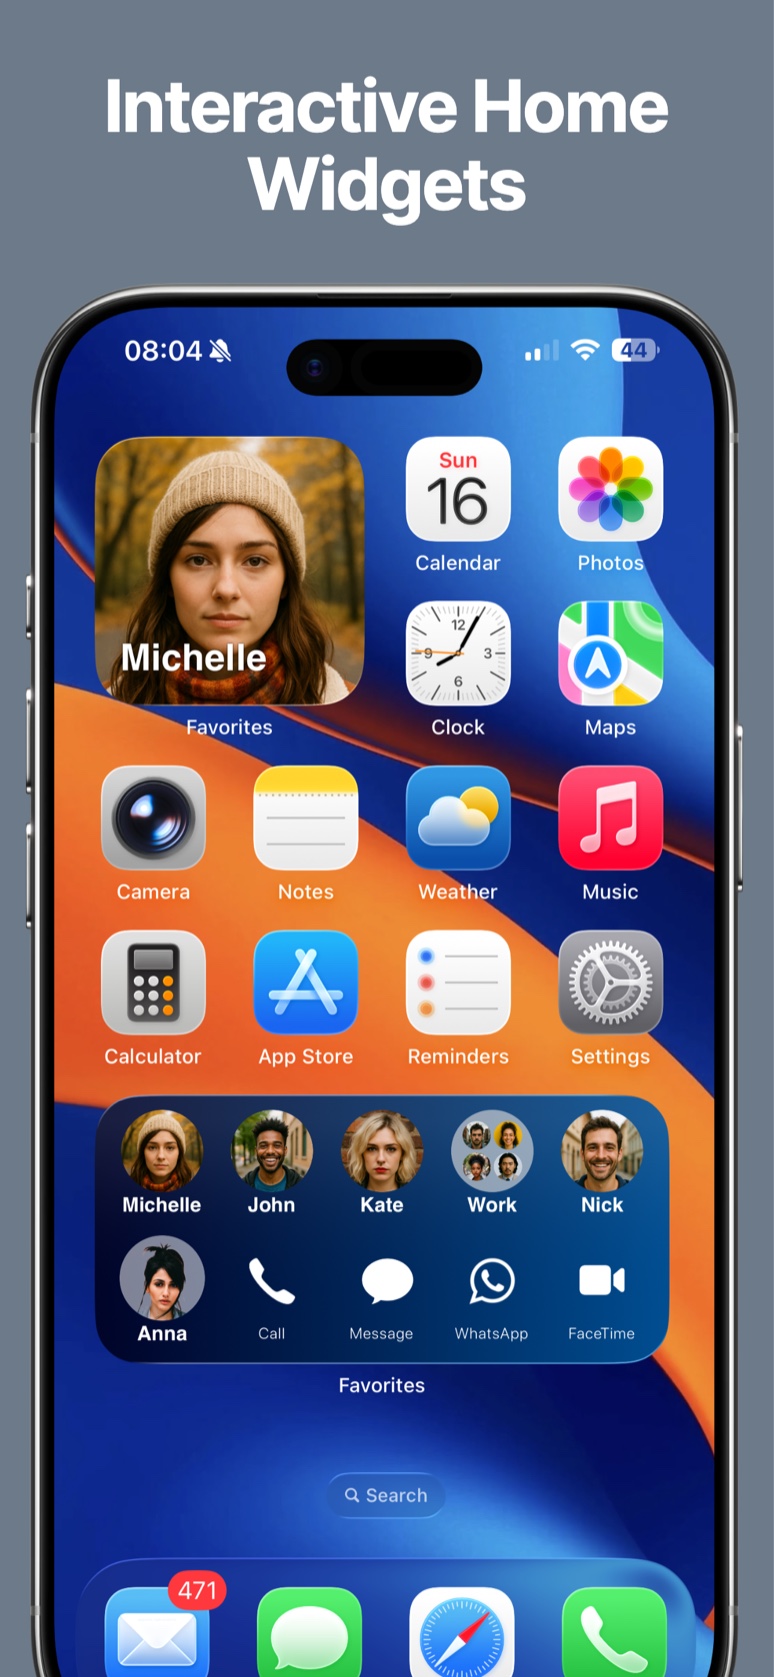
Before you begin
Create
Open Favorites Widget and create a widget. Select the contacts you want to keep close, arrange them in the order you prefer, and choose the contact photos and names that should appear.
Connect
Choose a single quick action when you always contact someone the same way, or enable multiple choices such as Call, Messages, FaceTime, WhatsApp, Telegram, and email.
Home Screen
Lock Screen
Personalize
Return to Favorites Widget to change contact photos, colors, backgrounds, layouts, group organization, and enabled actions. If a change does not appear immediately, open the app again and give iOS a moment to refresh the widget.
Need a hand?
The Support page covers permissions, stale widgets, purchases, and common setup questions.